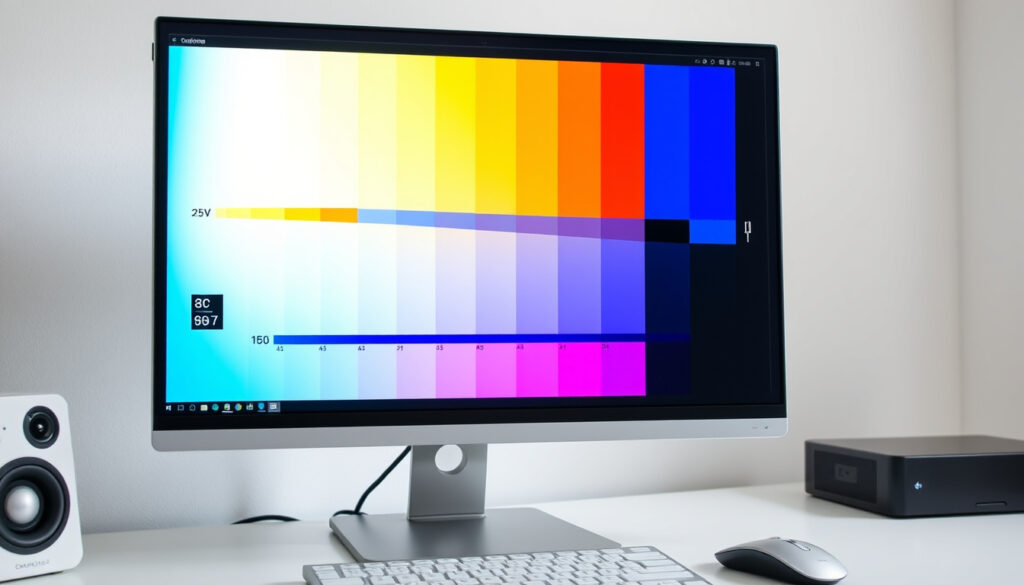
Calibrate Monitor in Windows, macOS & Without a Colorimeter
Anyone who has compared the same photo on a phone and a desktop monitor knows the feeling: the colors that should match don’t. Windows and macOS both ship with built-in calibration utilities, and Microsoft’s own walk-through covers gamma, brightness, contrast, and color balance in a few steps. The practical part is that you can do this today without buying hardware — and still know when a colorimeter is worth the money.
Windows path: Settings > Display > Calibrate display color · macOS path: System Preferences > Displays > Color > Calibrate · Warm-up: 15–30 minutes before calibration · White point: D65 / 6500K · Gamma: 2.2
Quick snapshot
- Windows 11 includes a built-in calibration tool under Settings > System > Display > Color profile (Microsoft Support (Windows display help)).
- macOS includes Display Calibrator Assistant, which creates a display color profile (Apple Support (macOS display documentation)).
- Windows 11 ships a separate HDR Calibration app for HDR-capable displays (Microsoft Support (HDR calibration guide)).
- How fast a panel drifts depends on usage and display type, so there is no universal recalibration interval.
- Default color presets vary sharply from one monitor brand to another, so “factory defaults” are not a fixed baseline.
- Software-only calibration relies on your eyes, which makes ambient light and viewing angle part of the result.
- Re-run calibration after changing your graphics card, updating drivers, or moving the monitor to a different room. (Microsoft Support (HDR calibration guide))
- Most calibration workflows start with a 15–30 minute warm-up so the panel reaches stable brightness. (Microsoft Support (HDR calibration guide))
- For HDR content, run the Windows HDR Calibration app once HDR is enabled on a compatible display (Microsoft Support (HDR calibration guide)).
- Verify with black-level, white-level, and gamma test patterns before trusting the result. (Microsoft Windows Help (calibration guidance))
- If you print photos or match brand colors, a hardware colorimeter is the next step. (Microsoft Windows Help (calibration guidance))
- Keep the display at its native resolution so the calibrated image stays sharp (Microsoft Windows Help (calibration guidance)).
Eight rows, one pattern: the targets Microsoft keeps repeating — native resolution, sRGB, D65, gamma 2.2 — show up in almost every calibration guide worth following, and the last two rows are where most people skip the prep work.
| Setting | Recommended value |
|---|---|
| Windows 11 path | Settings > System > Display > Color profile > Calibrate display (Microsoft Support (Windows display help)) |
| macOS path | System Preferences > Displays > Color > Calibrate (Apple Support (macOS display documentation)) |
| Resolution | Native resolution during calibration |
| Color mode | sRGB when available (Microsoft Windows Help (calibration guidance)) |
| White point / gamma | D65 (about 6500K) / 2.2 |
| Brightness / contrast / color balance | Adjusted visually in the built-in tool |
| Warm-up time | 15–30 minutes before calibration |
| Luminance target | Around 120 cd/m² for color-critical work |
How do I calibrate my monitor screen?
Calibration sounds like a lab procedure, but the operating system you are already using ships with the tools. Windows and macOS each take about ten minutes on a quiet screen, and both save a color profile you can switch back to.
How do I calibrate my monitor in Windows 11?
- Open Settings > System > Display and scroll to Color profile (Microsoft Support (Windows display help)).
- Choose Calibrate display to launch the built-in tool.
- Work through the on-screen steps for gamma, brightness, contrast, and color balance.
Windows walks you through gamma first, then brightness and contrast, then color balance. The tool shows sample images for each step, and you move the slider until the samples look right. At the end, Windows saves the result as a display profile that stays active until you change it.
How do I calibrate my monitor on a Mac?
- Open System Settings > Displays and open the Color profile menu (Apple Support (macOS display documentation)).
- Select Customize to launch Display Calibrator Assistant.
- Finish the visual adjustments; macOS assigns the finished profile to the display automatically.
The assistant guides you through the same fundamentals as Windows: gamma, brightness, contrast, and white point. Apple notes that perceived color changes with ambient light, viewing position, viewing angle, and display age — so the room you calibrate in is part of the result.
How do I calibrate my monitor without a colorimeter?
Software-only calibration is a visual judgment call, not a measurement. You are matching patterns with your eyes, so the result is only as trustworthy as the room you calibrate in.
The no-hardware route uses the built-in Windows and macOS tools plus static test patterns. You adjust brightness, contrast, gamma, and white point until reference patterns look correct. That covers a typical home setup well, and it is exactly what most people need from monitor calibration — no extra purchase required.
The most common mistake is judging brightness in a bright room. Brightness and black-level judgments are only reliable in the lighting you actually work in, so close the blinds and turn off the overhead light before you start.
The implication: the tools are already installed. The difference between “calibrated” and “not calibrated” is whether you take the ten minutes to run them — and whether you verify the result afterward.
How do I tell if my monitor is calibrated correctly?
A color profile is only useful if the panel is actually showing what the profile expects. Test patterns are the fastest way to check — no colorimeter required.
How do I check for black-level clipping?
- Open a near-black gradient test pattern and study the darkest steps.
- Raise brightness until the darkest steps separate, then lower it until they are just visible.
- Do the same at the white end to catch clipped highlights and blown-out whites.
Black-level clipping crushes shadow detail, turning dark photos into a single black block. White-level testing works the same way at the top of the range: if the brightest steps merge into pure white, you are losing highlight details.
What should a gamma test pattern look like?
- A gamma pattern shows a gray ramp from black to white; a calibrated display keeps every step distinct.
- Banding or crushed shadows in the ramp mean the gamma curve is off.
- If the middle of the ramp looks too dark or too light, the display is not meeting the 2.2 target.
Gamma controls how bright mid-tones appear. At the 2.2 target, the gray ramp should look even — no single step jumping out as darker or lighter than its neighbors. Apple makes test patterns available through QuickTime for evaluating supported display presets (Apple Support (display calibration overview)), and similar grayscale gradients are easy to find online.
A gradient test pattern either looks smooth or it doesn’t. If the near-black steps merge into one block, your black level is crushed; raise brightness until the first steps separate, then back off slightly.
The catch: test patterns reveal what your eyes can see — and only what your eyes can see. A bright, washed-out room can make a correctly calibrated profile look wrong, so fix the lighting before you trust the pattern.
How do I recalibrate my screen?
Recalibration is not a calendar chore. It is a response to change, and the triggers are easy to recognize.
How often should I recalibrate?
- After changing your graphics card or updating display drivers.
- After moving the monitor to a different room or lighting setup.
- When shadow detail starts looking crushed or whites start looking dull.
There is no universal interval, because panel drift depends on usage and display type. A monitor used eight hours a day for color work will drift faster than a secondary screen that barely warms up. Most calibration workflows start with a 15–30 minute warm-up so the panel reaches stable brightness before you judge anything.
Should I reset my monitor to factory defaults first?
- Open the monitor’s on-screen display (OSD) and choose Reset or Factory Reset.
- A reset clears previous custom settings so calibration starts from a known baseline.
- For VGA or analog connections, many displays also include Auto Adjust in the OSD.
Factory reset is a starting point, not a fix. If the display’s default preset is inaccurate, a reset returns you to that inaccurate baseline — which is why test patterns, not the reset button, should have the final say.
A “factory default” is whatever that manufacturer decided looked good in a showroom. Reset to establish a baseline, then use test patterns to choose the preset that is actually closest to accurate.
The pattern: recalibration matters most after change — new hardware, new drivers, a new room, or months of quiet drift.
How do I adjust my monitor to fit my screen?
Screen-fit problems and color problems live in the same settings menus, but they are different fixes. Geometry first, then color.
Why won’t my monitor go full screen?
- Check the resolution in Settings > System > Display > Scale and Display resolution.
- If scaling is above 100 percent, the desktop can overflow the panel edges.
- For analog connections, use the OSD’s Auto Adjust to realign the picture.
A display running below native resolution often shows black bars, a stretched image, or a desktop that spills past the visible area. Native resolution maps one software pixel to one physical pixel — and it is the right condition for calibration too, because the whole adjustment assumes you are looking at the panel’s true pixel grid.
How do I resize my screen back to normal?
- Open Settings > System > Display and set Display resolution to the option marked Recommended.
- Set Scale back to 100 percent unless you deliberately want larger text.
- Press Win + Ctrl + Shift + B to restart the graphics driver if the new settings do not apply cleanly.
Fix resolution before you recalibrate. If you change the resolution after calibration, the panel’s pixel mapping changes and the profile no longer lines up with the screen the way it did.
How do I adjust the screen size to fit my monitor in Windows 11?
- Open Settings > System > Display and confirm the resolution matches the panel’s native resolution.
- Check the refresh rate under Advanced display; a wrong refresh rate can cause flicker or odd scaling.
- Confirm the change when Windows previews it — the system reverts automatically if you do nothing.
After any display change, Windows shows a preview and asks for confirmation. If the image looks wrong, wait ten seconds and the previous settings come back on their own.
Resolution and calibration are different fixes. A blurry or overscanned image is a resolution and scaling problem; a blue or washed-out image is a color problem. Do not tune colors to fix a geometry issue, or you will end up with a sharp image that is shifted and a profile that is wrong.
The trade-off: dropping below native resolution makes text bigger and interfaces easier to read, but it removes the panel’s sharpest mapping and quietly undermines the calibration you just completed.
How do I calibrate monitor color?
Monitor color is where the built-in tools end and hardware begins. The dividing line is simple: software improves consistency, hardware measures accuracy.
How do I calibrate my monitor with a colorimeter?
- A colorimeter reads the display’s actual light output and builds a correction profile from measurements.
- Consumer devices from Spyder, X-Rite, and Datacolor run from about $100 to $200 and work with software such as DisplayCAL, Spyder, or i1Profiler.
- The resulting profile is stored at the operating system level and applied automatically.
The colorimeter replaces your eyes: software shows known colors while the device measures what the panel actually emits, and the resulting profile corrects the difference. That is the route to take when your colors will be compared against a print, a client file, or another calibrated monitor.
How do I calibrate my monitor for photo editing?
- Target a D65 white point and gamma 2.2 — the values Microsoft’s guidance uses as defaults.
- Aim for roughly 120 cd/m² if your workflow controls target brightness.
- Control ambient light, since Apple notes that viewing angle, viewing position, and display age all change what you see.
For photo editing, the target matters more than the tool. D65, gamma 2.2, and about 120 cd/m² are the reference points you will see repeated across calibration guides, and they are a sensible goal for both soft-proofing and screen-to-print matching.
A colorimeter turns “looks right to me” into reproducible numbers. If you edit photos that will be printed or judged by a client, that is the difference between guessing and verifying.
The implication: hardware calibration is for anyone whose color decisions are checked against a real-world reference — prints, products, or another screen. Everyone else can stop at the built-in tools.
Software-only calibration in six steps
Here is the full no-hardware workflow, in an order that avoids the most common mistakes.
- Warm up the display. Give the panel 15–30 minutes to reach stable brightness and color before you adjust anything.
- Reset the monitor. Open the OSD and choose Factory Reset, then select the sRGB preset if the display offers color modes.
- Set native resolution. Use the panel’s native resolution and 100 percent scaling so calibration targets real pixels.
- Run the built-in tool. On Windows: Settings > System > Display > Color profile > Calibrate display. On macOS: Display Calibrator Assistant from the Color profile menu.
- Set gamma and white point. Choose gamma 2.2 and D65 (6500K) when the tool exposes those controls.
- Verify with test patterns. Check black level, white level, and the gamma ramp; re-run any step that fails.
Run through the sequence again after any hardware change — a new driver, a different input, or a new room. Each pass takes about ten minutes once the routine is familiar.
The pattern: the order matters. Warm-up, reset, and native resolution come first; the actual adjustment second; verification third.
What’s confirmed and what’s still unclear
After working through the tools, the patterns, and the trade-offs, this is where the evidence actually stands.
Confirmed facts
- Windows and macOS both include built-in calibration utilities (Microsoft Support (Windows display help); Apple Support (macOS display documentation)).
- Colorimeters provide objective measurements, while visual-only adjustment does not (Apple Support (display calibration overview)).
- HDR-capable displays on Windows 11 have a dedicated HDR Calibration app (Microsoft Support (HDR calibration guide)).
What’s unclear
- How often to recalibrate depends on panel drift and usage conditions — there is no universal schedule.
- Default presets vary sharply across monitor manufacturers, so “factory default” is not a consistent baseline.
- Visual-only calibration accuracy depends heavily on ambient lighting and the user’s color perception.
The pattern: the confirmed list is short because calibration is about hitting known targets; the unclear list is longer because panels, rooms, and eyes all vary.
Calibration guidance from the platforms themselves
Microsoft’s own display walk-through is the practical baseline: follow the in-tool steps for gamma, brightness, contrast, and color balance.
— Microsoft Windows learning center (official calibration guide)
Apple separates quick visual fine-tuning from full recalibration, and its documentation notes that full recalibration normally requires a spectroradiometer.
— Apple Support (display calibration overview)
The pattern: both companies treat calibration as routine maintenance — and neither pretends that a visual pass is a measurement.
What this means for your setup
Software-only calibration gets you to a consistent, neutral picture with tools that are already installed; the remaining gap only matters when someone else will check your color. For a home user who watches video and edits the occasional photo, the built-in Windows and macOS walk-throughs plus a few test patterns are enough. For a photographer or designer whose prints, client files, or product shots are compared against a reference, the choice is clear: buy a $100–$200 colorimeter, or keep shipping colors you cannot verify.
Related reading
If display quality is on your mind, these reviews look at color accuracy and screen performance on real devices:
- Canon EOS R6 Mark III: Price, Specs & Review
- Samsung Galaxy A55 5G Review: Specs, Price, Issues, Worth
Frequently asked questions
What does monitor calibration actually measure?
Calibration records corrections for how the display currently reproduces brightness, contrast, gamma, and color balance. The built-in Windows and macOS tools walk you through each of these visually and save the result as a color profile.
Is a colorimeter worth it for home use?
For general use — web browsing, video, casual photos — the built-in tools plus test patterns are usually enough. A colorimeter pays for itself when you print photos, edit for clients, or need multiple monitors to match each other.
Can monitor calibration fix washed-out colors?
Yes, to a point. Calibration pushes the display toward targets like sRGB, gamma 2.2, and D65, which often restores contrast and saturation. If the panel itself is low quality, calibration improves consistency but cannot add color range the hardware does not have.
Does monitor calibration affect refresh rate?
No. Calibration changes the color profile, not the scanning behavior. Refresh rate is set separately in the operating system’s display settings and in the monitor’s OSD.
Do I need to calibrate a new monitor out of the box?
It is worth doing once. New monitors often ship in vivid or gaming presets that exaggerate saturation. Running the built-in tool and selecting sRGB gives you a neutral starting point to judge from.
Can I use my phone to calibrate a monitor?
You can use a phone as a rough reference by showing a known image on both screens, but a phone is not a measurement instrument. For real accuracy, a colorimeter is the only consumer-grade option.
More related posts
 How to Start a Morning Routine: Simple Expert Steps
 Lidl Leaflet This Week – Offers, Staff Pay & Digital Access
 Match Attax Advent Calendar 2025/26: Contents, Value & Review
 Houses for Sale in Ballinteer: 2024 Market Guide
 Translate Spanish to English Audio – Best Free Tools 2025
 AA Insurance Phone Number – Official NZ Contacts and Hours
 How to Translate English to Russian: Best Free Tools & Tips
 La Roche-Posay Effaclar Duo Recall & Discontinuation Guide